bitsCTF - Steganography - Finders Keepers
Weird.png isn’t just weird.

Challenge description
What even is this image bruh.
Find the flag.
By: darthlazius@13
Flag : BITSCTF{1_4m_5l33py_1256AE76}
Ressources

We are given a PNG image file named “weird.png” that looks like some random squares in multiple colors.
This challenge was in the forensics category during the CTF but in my opinion it is more Stegangraphy so I changed the category.
Tools
In this challenge, we will need several tools to extract embedded files from one another:
binwalk: powerful tool for analyzing and extracting embedded files, primarily used for firmware analysis.foremost: file carving tool that extracts files based on file headers, footers, and internal data structures.
In this writeup, I will walk through my approach and the tools used during the process. In addition to the above tools, I also utilized:
exiftool: tool for displaying and editing EXIF metadata in image files.pngcheck: utility that verifies the integrity of PNG images.HxD: hex editor for Windows.
Walkthrough
Initial Analysis
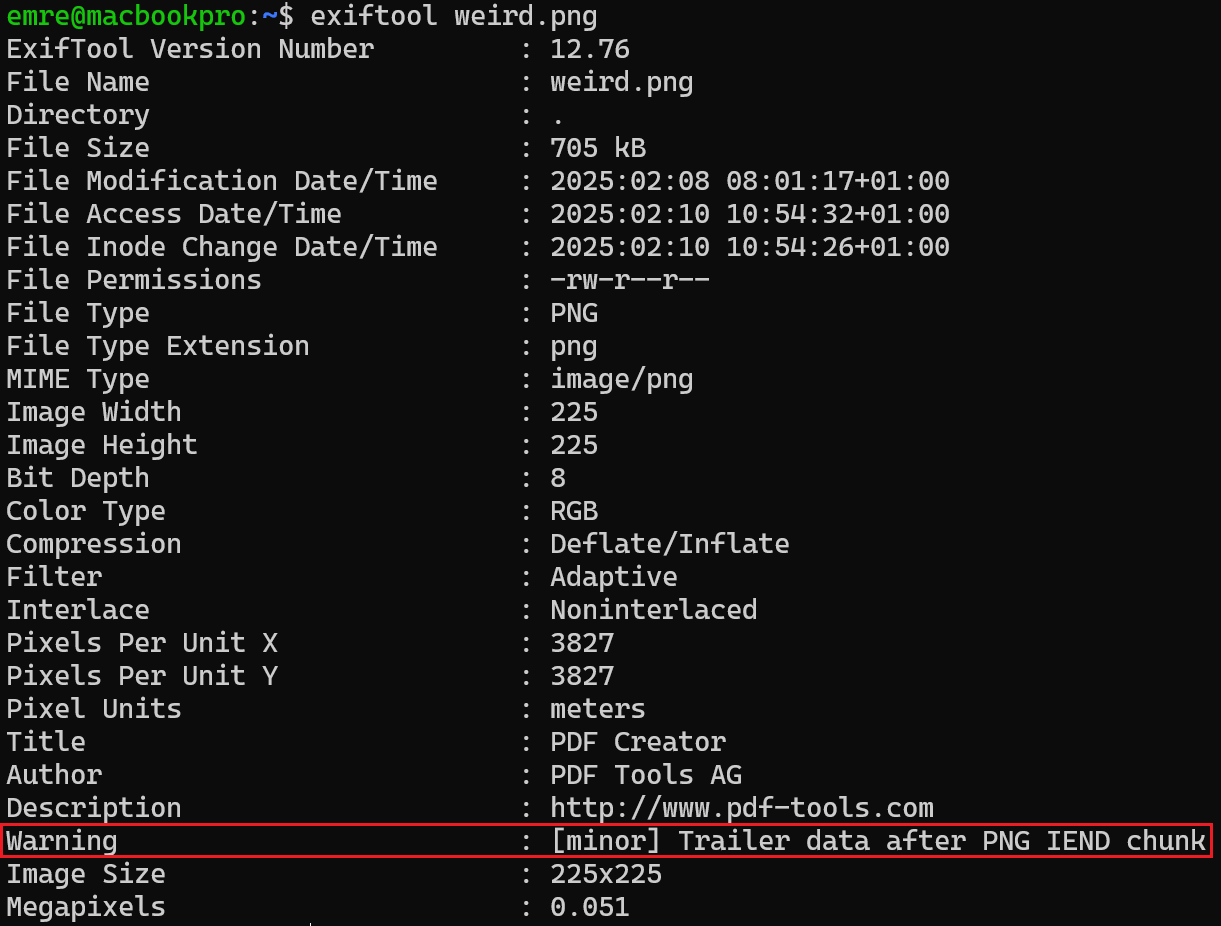
We begin by analyzing the image’s EXIF metadata using exiftool. An interesting detail appears right away: a warning message indicating that there is data after the PNG IEND chunk.
IEND chunk
The IEND chunk marks the end of a valid PNG image. There should only be one IEND chunk in a PNG, and it should be the last section of the image file.
We can confirm this warning message from exiftool by running pngcheck on the image. The tool verifies that the image structure deviates from the expected format, showing the presence of extra data after the IEND chunk.

Another clue suggesting the presence of additional data is the image size. If the image were using the RGBA color model (with 4 bytes per pixel, 1 byte per channel), the size for an uncompressed 255x255 image would be around 260 kB. However, the actual image size is 705 kB, which is significantly larger and suggests that hidden data is present.
Examining the hex
To dive deeper into the file, we use HxD, a hex editor for Windows, to inspect the raw hexadecimal content of the image. The first thing we check for is the PNG magic number, represented by the hex value 89 50 4E 47 0D 0A 1A 0A.

Since we’re investigating data after the PNG image, we search for the IEND chunk, which indicates the end of a PNG image. Upon inspection, we see that additional data follows the IEND chunk. Based on the hex values, it looks like another file is embedded directly after the PNG. By examining its magic number, we identify it as a JPEG (JPG) file, as the magic number is FF D8 FF E0 00 10 4A 46 49 46 00 01.

Knowing that JPEG files have a specific structure, we look for the EOI (End Of Image) segment, marked by the hex value FF D9, which indicates the end of the JPEG file. Searching for this segment confirms the presence of additional data beyond the JPEG.
This leads us to more data, which appears to be a WAV (Waveform Audio File Format) file, commonly used for audio content.

Since WAV files do not have a clear end marker like PNG or JPEG files, we cannot use our previous method of searching for specific segments to identify further embedded files. For now, let’s focus on extracting the files we’ve identified and analyzing their contents.
File Signatures (Magic Numbers) A comprehensive list of magic numbers for various file formats can be found on Wikipedia.
Extracting embedded files
To extract the embedded files, we start by testing with binwalk.

Based on its analysis, binwalk successfully detects the JPEG file but does not identify the WAV file. After additional testing, I am still unable to extract the WAV file using binwalk. Since foremost specializes in file carving and supports a broader range of formats, I decide to try it instead.
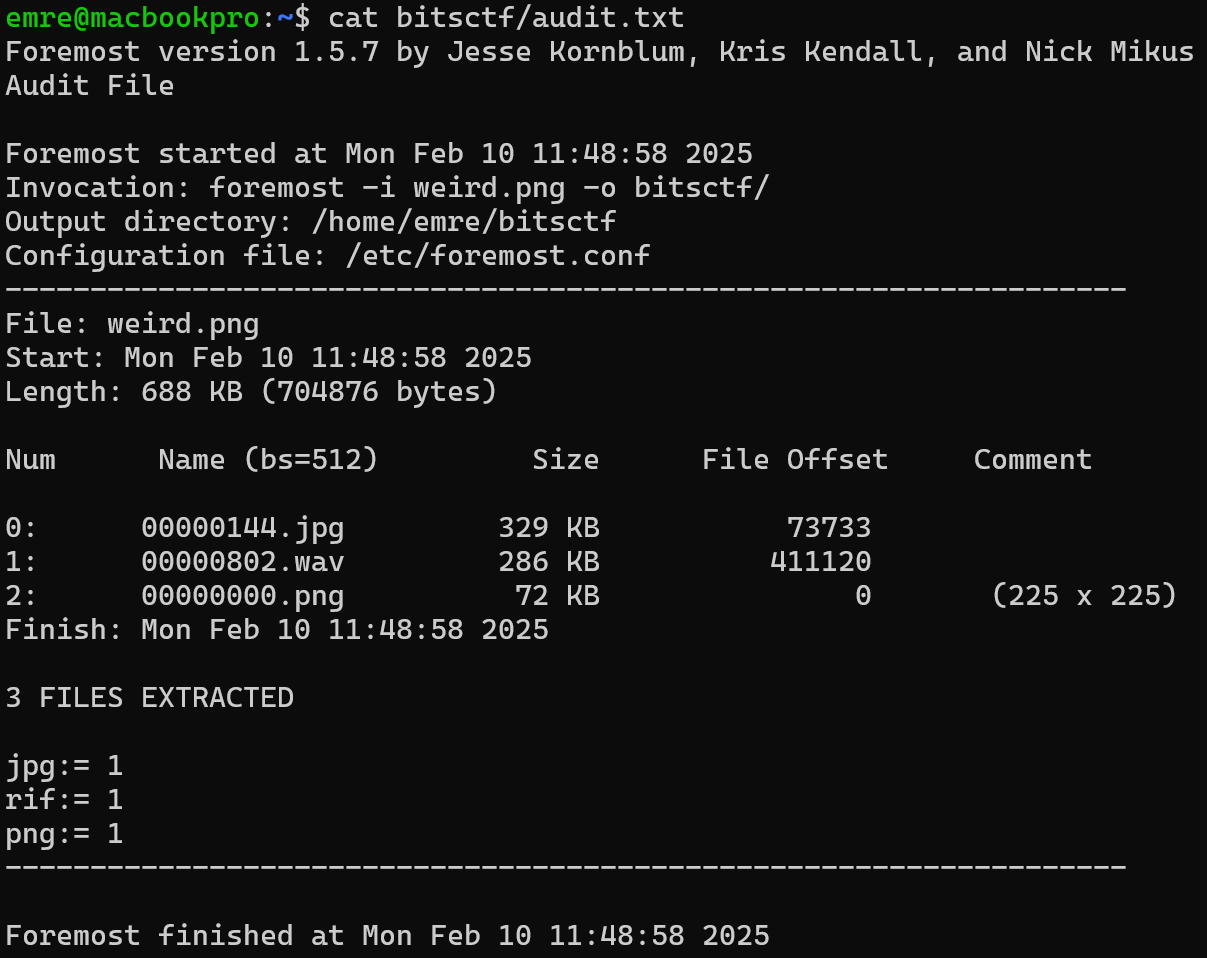

Foremost successfully detects and extracts all three files we were searching for. Here is the extracted image:
Listening to the extracted WAV file, we hear a sequence of beeps that sound like ... . .-.. .-.. ---. This pattern is immediately recognizable as Morse code.
Decoding the morse code
To decode the Morse code, we search for an audio-based Morse code decoder and find a useful tool at morsecode.world. After uploading our WAV file, we obtain the following result:
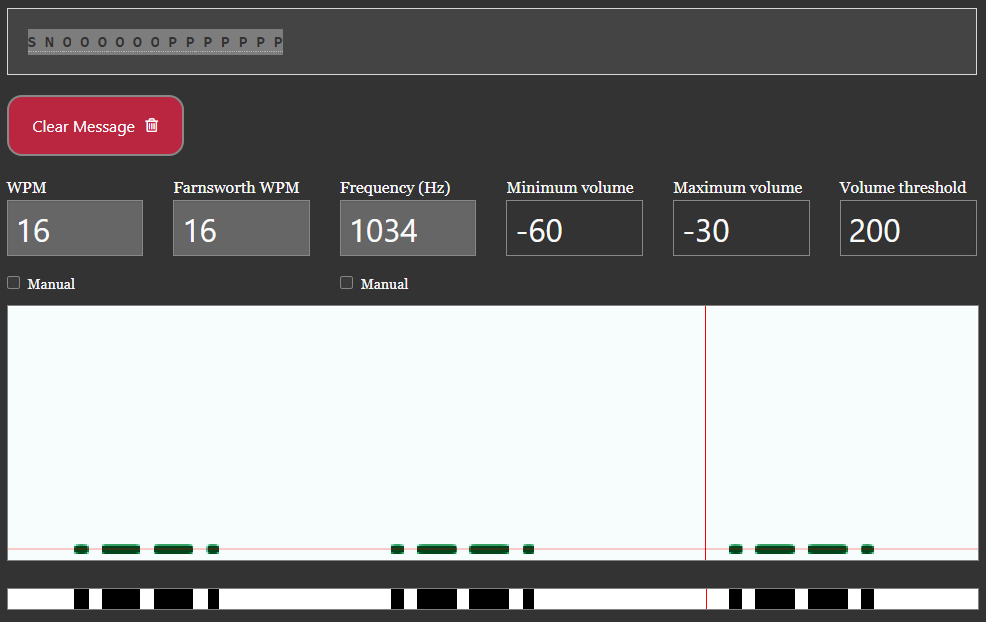
Image steganography
Now that we have extracted a text string, the next step is to determine its purpose—if it is indeed relevant to solving the challenge. One of the most well-known steganography techniques is Least Significant Bit (LSB) encoding, where hidden data is embedded in an image by modifying the least significant bits of pixel values. This technique can also be combined with password-based encryption, adding an extra layer of security.
To check for hidden steganographic data, we analyze both images. First, we examine the original PNG using FutureBoy’s online steganography decoder.
We attempt to extract hidden text using S N O O O O O O P P P P P P P, but it yields no results. Trying variations like SNOOOOOOPPPPPPP and snooooooppppppp also returns nothing.
Next, we analyze the JPEG image using the same approach. This time, when we input snooooooppppppp as the password, we successfully extract an image containing the following result:

Conclusion
I wasn’t able to fully solve this challenge during the event, but after it ended, I reviewed some hints shared by other participants to complete it.
Despite that, it was still an exciting experience to tackle it on my own, experiment with steganography, and explore different techniques for uncovering hidden files and data within other files.
Thank you for reading my write-up! See you in the next one!
emree1